Running Dinner Planner
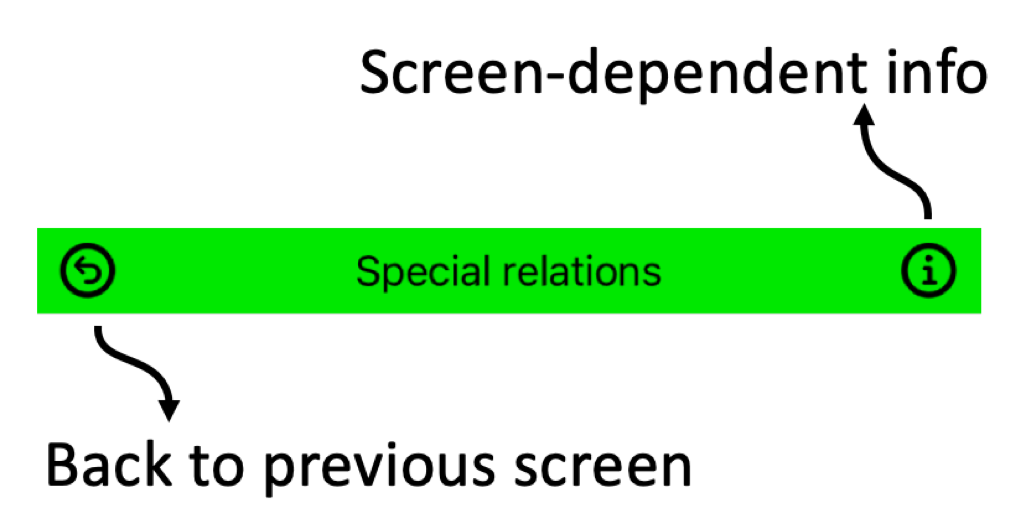
Special Relations
General
In a lot of practical Running Dinner cases, meetings between some Participants should be avoided, or perhaps promoted. For example, it is often desirable for spouses (more generally: people that live together) to move independently of each other and, if at all possible, not even meet a single time (unless they host a Course, in which case it is possible to require both Hosts to be present - see step 2). Conversely, it may be desirable - but not an absolute necessity - for some Participants to stick together when they move from Course to Course.
For this reason, the Planner offers the concept of ‘Special Relations’ between Participants, with a default Special Relation of ‘housemate’. The user is free to define up to 5 Special Relations in step 3, although it is advised not to have more than 2. The Planner app will attempt to honour these Special Relations where possible by way of the penalty system (see the penalty section in the Planner screen): any meeting between Participants with a Special Relation will contribute to the overall penalty the seating arrangement (aka solution, aka configuration) receives. Note that this ‘penalty’ can in fact be negative. For example, if the penalty slider is set to the far left, the penalty associated with the Special Relation wil be negative, in which case the Planner’s optimisation routines will try to favour meetings between Participants with this Special Relation.
With the types of Special Relations defined in step 3, this screen can be used to assign a Special Relation to any couple of Participants. Note that any two Participants can only have 1 Special Relation - it is not possible to assign both ‘housemate’ and (for example) ‘avoid meeting’ to the same couple. There are 3 ways of inputting this data:
Input methods
By Relation
This screen can be used to select the Special Relation the user wants to assign to certain couples. For each Participant, this Special Relation can then be assigned to any other Participant by picking him or her from the drop-down menus, and clicking the “-> special” button located to the right of the selected Participant. Conversely, the ‘-> normal’ abutton can be used to remove n existing Special Relation with the picked Participant, i.e., for their relation to be reset to ‘normal’.

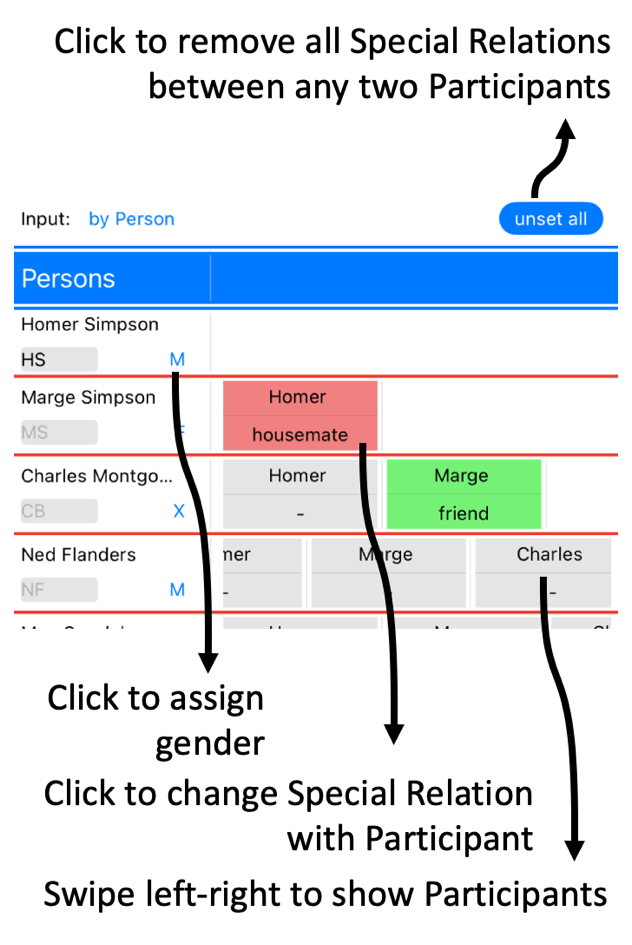
By Person
This screen shows all the Participants in one table. All rows in the table can be swiped left and right, and the lower part of the coloured cells can be clicked to define a Special Relation between the two Participants on that row. Note that this screen can also be used to assign a gender to a Participant.
As CSV
CSV - the interface
Arguably the easiest way of inputting Special Relations between Participants into the system is by way of the MyPlanner section on the website. To make use of this, the user needs to create and login to an account on www.running-dinner-planner.com, and copy-paste data from, for example, Excel into the web interface. See also the CSV tutorial on the Tutorials page. That data can subsequently be downloaded from MyPlanner with the click of the cloud (
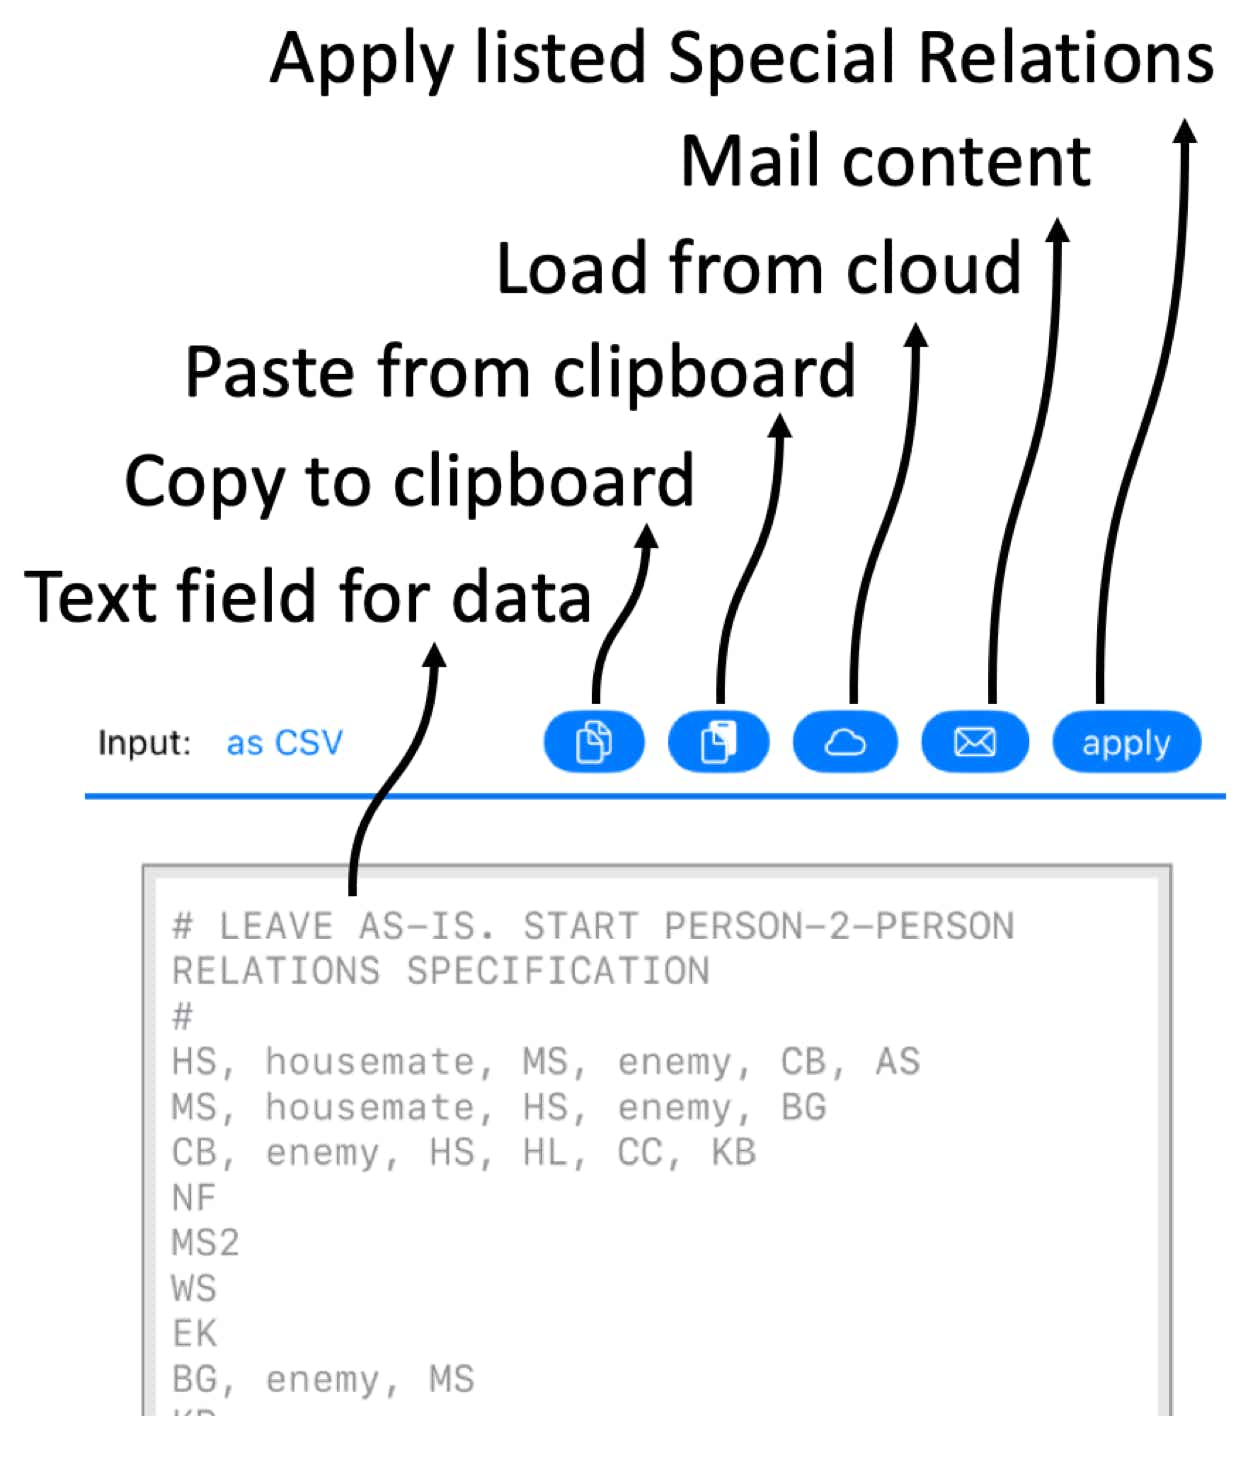
The format the data needs to have is that of a Comma-Separated-Value (CSV) list, and can be inspected in the CSV text field. One line should contain:
ShortName, RelationShip_1, SN_1, SN_2, ..., RelationShip_2, SN_3, SN_4,...
Notes:
When loaded, the text field will contain the data currently available to the Planner. With the Copy (
CSV - downloading data from the cloud
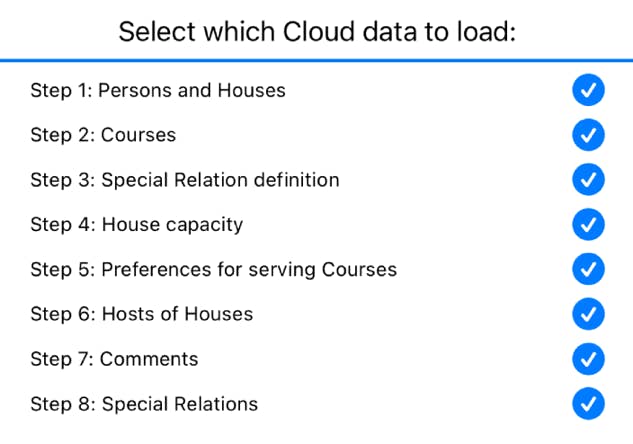
In MyPlanner data can be stored for all the Steps involved in planning a Running Dinner. While, for each Step, the relevant data can be loaded on its own, the CSV functionality also allows for importing data for more than just 1 Step into the Planner. That is to say: upon pressing the cloud button (