Running Dinner Planner
Invitations
General
Once a seating arrangement has been generated, the Planner offers functionality to turn the data into personalised PDF invitations for Participants and, for Hosts, instructions on what and who to expect. If e-mail addresses were provided in the Persons and Houses input, the Planner furthermore offers functionality to automatically mail the invitations and instructions to the appropriate e-mail addresses. Alternatively, a single PDF with all invitations and instructions can be mailed to an e-mail address of choice, or send elsewhere by way of the export facilities of the device running the Planner app (e.g., Airdrop).
Creating letters for all Participants and Hosts is accomplished by way of a ‘mail-merge system’. That is, it requires a template with placeholders, which is then ‘merged’ with the data of the seating arrangement to produce personalised invitations or instructions. For example, in places where the Participant’s name should be listed, a placeholder <GuestFullName> should be inserted in the template. Similarly, the placeholder <Course1_Address> should be used wherever the personalised letter should list the address where a Participant is meant to enjoy the first Course. The user can create and store 3 different templates, denoted as:
The first template is meant for creating full-blown invitation letters for Participants (aka Guests), with any and all details of their Running Dinner journey. The second is meant to create short-hand versions that Participants might want to wear as a badge. The last template is meant for Hosts, instructing them what Course they’ve been assigned, and how many Guests to expect.
It should not come as a surprise that the set of placeholders for Participant (aka Guest) invitations is different from the set of placeholders needed to create personalised instructions for Hosts. A full list of placeholders for the selected template, as well as the text currently in the text window, can be obtained by using the Copy (
The Planner offers tools to apply different formats to (parts of) the text, such as a different font, colour, or size. These can be chosen from the Font drop-down menu. To do this, the text-to-be-formatted should be selected first, after which the Font drop-down menu can be used to choose and apply the new font to the selected text.
Finally, a “Defaults” drop-down menu offers three Default templates that are tailored to the data in the Planner such as the number of Courses served, and whether or not a Reception and/or Afterparty is part of the Dinner.
The information banner
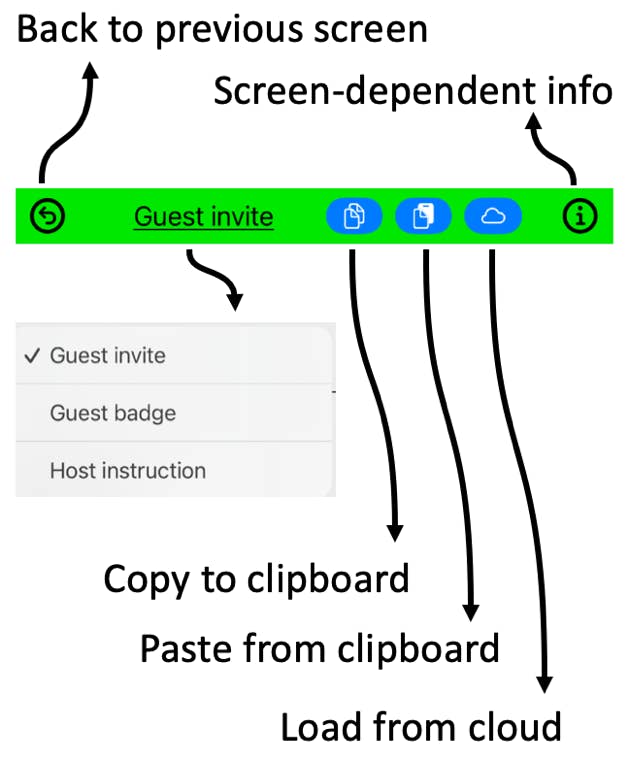
As with all screens, a context-dependent information banner is located at the top of the screen. It features a “back to previous screen” button on the left, and a button for context-dependent help on the right.
On this screen, the information banner also features a drop-down menu with which one of three types of personalised invitations/instructions can be generated: the first two are meant to be either a long or short version of invitations for Participants, and the third is an instruction letter for the various Hosts. Finally, the banner features buttons to copy or paste the contents of the textfield on this screen, and a button to load data from the cloud into the textfield.
Using cloud functionality
Arguably the easiest way of inputting the text for each of the three templates into the system is by way of the MyPlanner section on the website. To make use of this, the user needs to create and login to an account on www.running-dinner-planner.com, and copy-paste data from, for example, Excel into the web interface. See also the tutorial on the Tutorials page. That data can subsequently be downloaded from MyPlanner with the click of the cloud (
To placeholders needed to setup useful templates for Guest invitations, Guest badges, or Host instructions, as well as the text currently in the text box, can be obtained with the Copy (
The selection bar
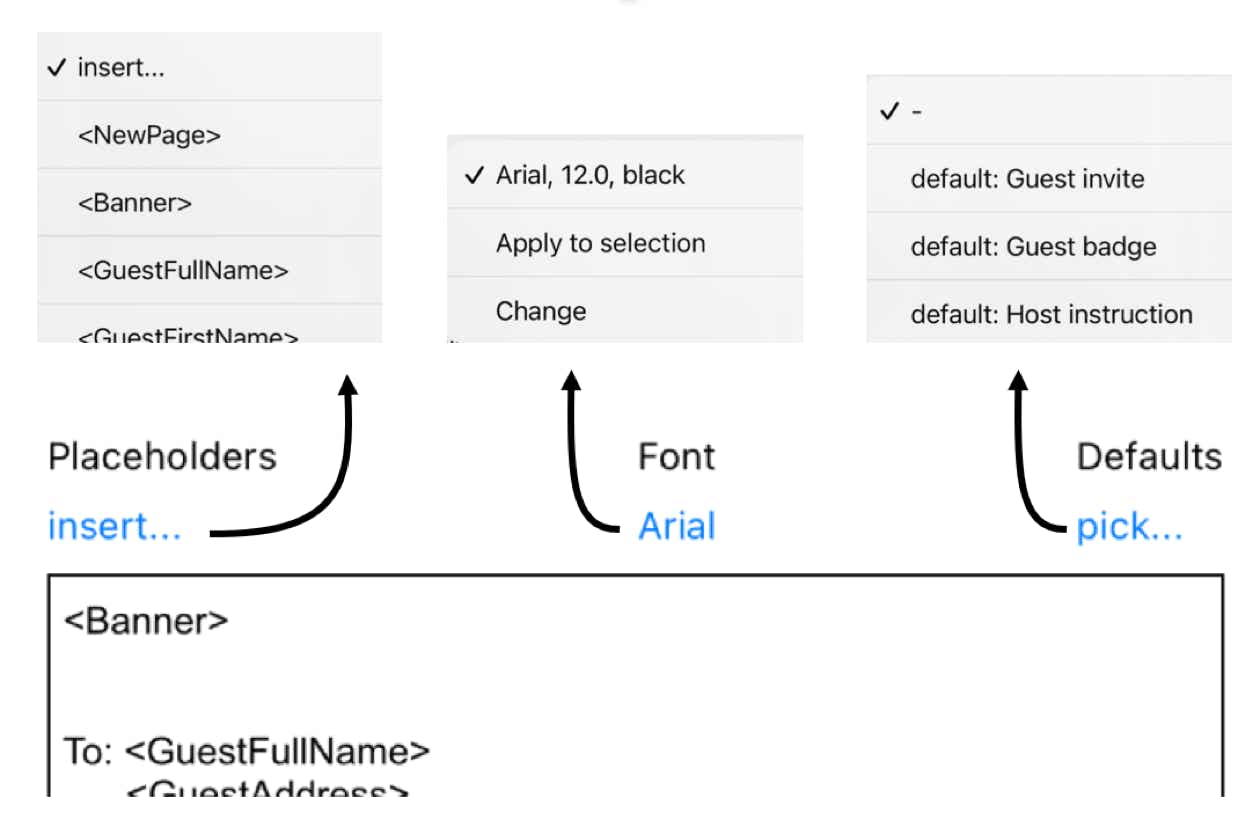
The template in the textbox can be changed and formatted in the box itself. For convenience, a number of drop-down menus have been positioned in the selection bar directly above the window:
To access and insert any and all placeholders available for the template selected in the information banner the user can use the PlaceHolders drop-down menu. When the PDF invitations/badges/instructions are generated, these placeholders will be replaced with the relevant data in the seating arrangement currently in the Planning screen. To placeholders needed to setup useful templates for Guest invitations, Guest badges, or Host instructions, as well as the text currently in the text box, can be obtained with the Copy (
The Font drop-down menu can be used to select the active font - type, color, and size - and apply it to the text currently selected
Finally, the “Defaults” drop-down menu offers three Default templates that are tailored to the data in the Planner such as the number of Courses served, and whether or not a Reception and/or Afterparty is part of the Dinner:
The bottom bar
At the bottom of the screen another set of controls is available. Here, the user can choose to…
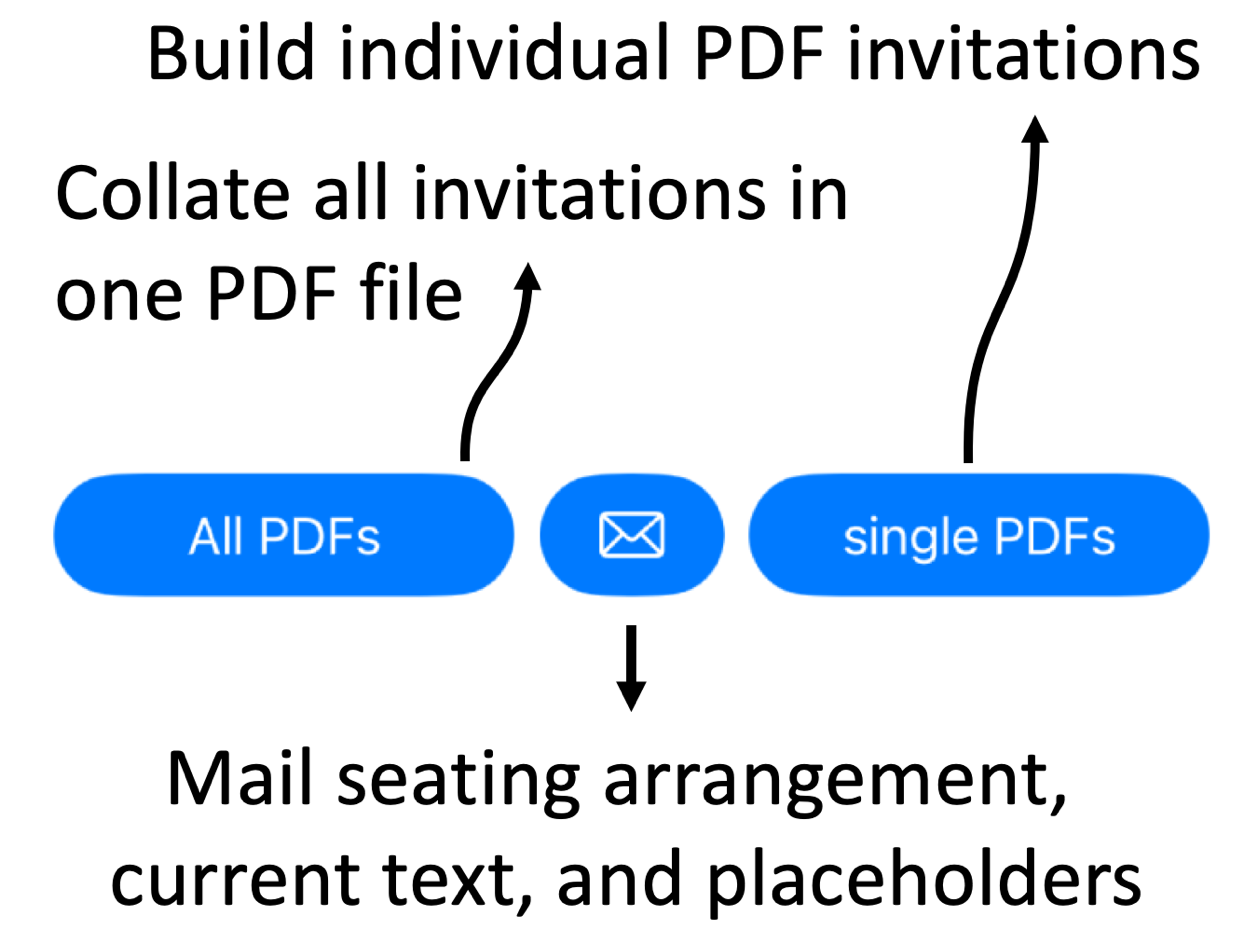
The All PDFs bottom bar
After the ‘All PDFs’ button was used to create a single PDF file with all Guest invitations, Guest badges or Host instructions, a second screen pops up showing the PDF. At the bottom of the screen, an export and a mail button make it possible to either use the device’s export features (e.g., AirDrop) or the device’s mail-client to export the results. Note that, if mail is use, the e-mail will also contain a break-down of the seating arrangement in ASCII-format. Note that, if a seating arrangement wass auto-generated, this functionality requires a Full Assist mode to be purchased.

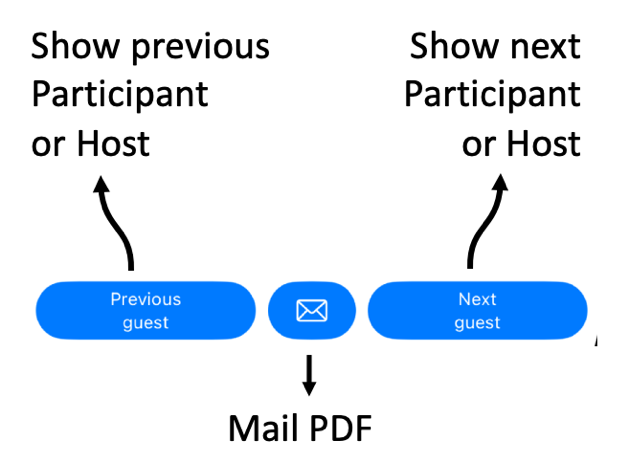
The single PDF bottom bar
After the ‘single PDF’ button was used to create single PDF Guest invitations, Guest badges or Host instructions for each Guest or Host, a second screen pops up showing the first PDF. At the bottom of the screen, buttons are available to show the previous or next Guest or Host. Note that this functionality requires at least a Partial Assist mode to have been purchased. Moreover, if the seating arrangement was auto-generated, this functionality furthermore requires a Full Assist mode. The mail button allow the currently shown invitation/badge/instruction to be e-mailed. If the original input contained e-mail addresses of the Participants, these will be filled in here automatically.