Running Dinner Planner
Step 1: Names and Addresses
The Running Dinner Planner app needs only minimal data to operate: the names of the Participants, and the Houses that will cater the various Courses. The only requirement is that each House needs to be the home of at least one Participant. That is to say: Participants can be inputted into the system without providing (the address of) the House that they are associated with, but Houses without Participants are ignored. Moreover, each House can have more than one Participant. Note that e-mail & gender, as well as ShortNames of Participants are useful for getting the most out of the Planner, but these are not required. The same goes for ShortAddresses for the Houses that take part in the Dinner.
So, a simple list of names and addresses is enough to successfully run the Planner, as in most cases it’s perfectly fine to rely on the default settings for all the other data the Planner requires:
• number of and name of Courses to serve and number of Hosts a Table requires (see Step 2)
• whether or not it should be avoided or promoted that certain Participants meet (see Step 3)
• maximum seating capacity of Houses, and the number of Course they are willing to cater (see Step 4)
• preferences any House has for catering a particular Course (see Step 5)
• which inhabitant of a House should serve as Host when serving a Course (see Step 6)
• any comments (i.e., dietary requirements) of Participants (see Step 7)
• meetings between which Participants should be avoided or promoted (see Step 8)
There are three ways of inputting names & addresses into the system:
• as Comma-Separated-Values input directly into the App or downloaded from a MyPlanner account
• on a person-by-person basis
• using the phone’s AddressBook
Input methods
CSV - the interface
Arguably the easiest way of inputting names and addresses into the system is by way of the MyPlanner section on the website. To make use of this, the user needs to create and login to an account on www.running-dinner-planner.com, and copy-paste data from, for example, Excel into the web interface. See also the CSV tutorial on the Tutorials page. That data can subsequently be downloaded from MyPlanner with the click of the cloud (
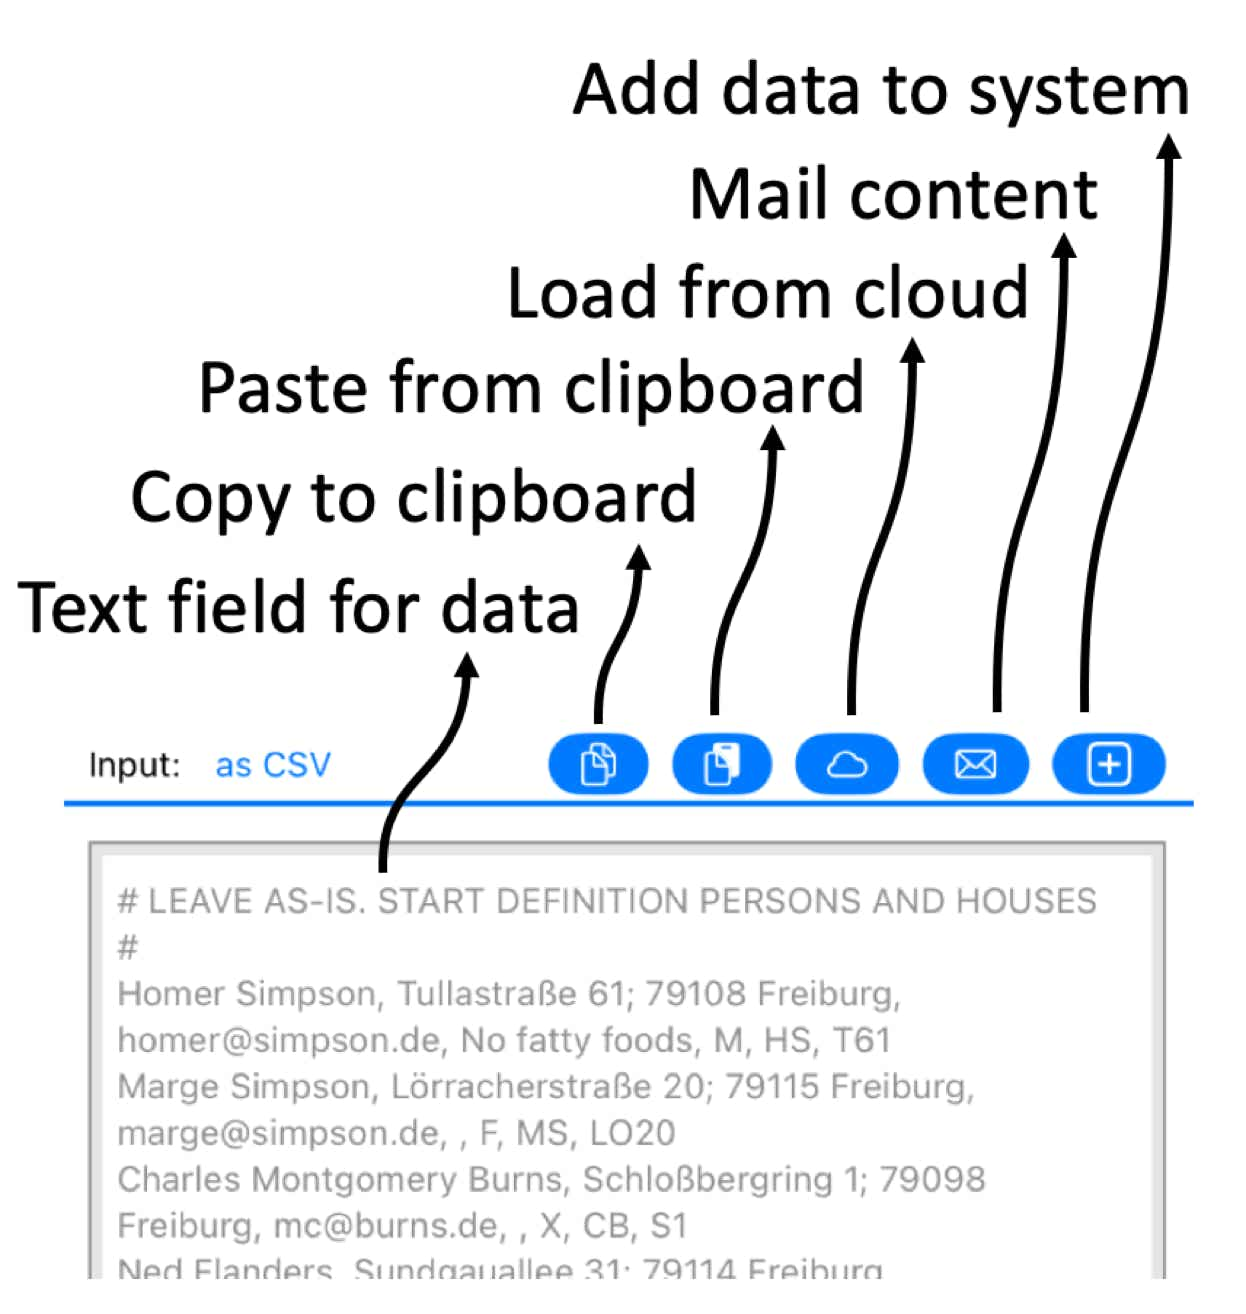
The format the data needs to have is that of a Comma-Separated-Value (CSV) list, and can be inspected in the CSV text field. One line should contains (red is required, black is optional):
Name, Address, E-mail, Comments, M/F/X, ShortName, ShortAddress
Notes:
When loaded, the text field will contain the data currently available to the Planner. With the Copy (
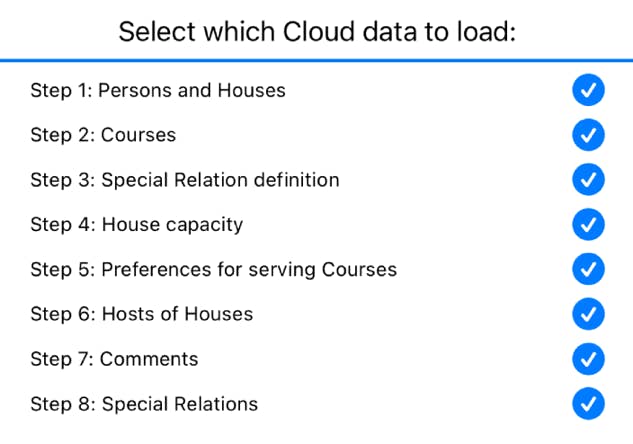
CSV - downloading data from the cloud
In MyPlanner data can be stored for all the Steps involved in planning a Running Dinner. While, for each Step, the relevant data can be loaded on its own, the CSV functionality also allows for importing data for more than just 1 Step into the Planner. That is to say: upon pressing the cloud button (
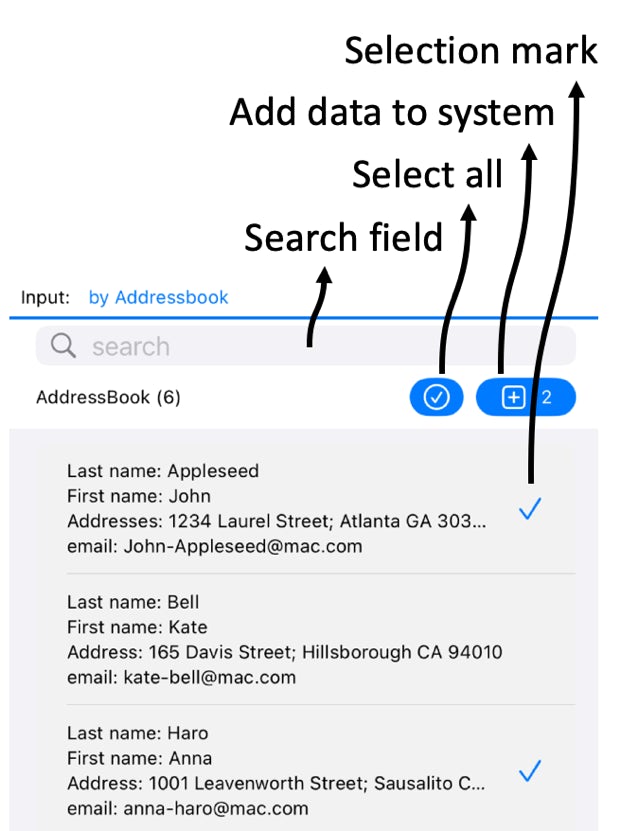
The Contacts AddressBook
It may be convenient to import names and addresses from the phone’s Contacts app. In order to do this, the Planner will first ask permission to access the Contacts on your phone. If permission is given, the details of your Contacts that are useful for the Planner (name, address, e-mail) are loaded onto the screen and can be imported into the Planner’s database. It is also possible to enter a search string to narrow down which Contacts to show. See also the AddressBook tutorial on the Tutorials page.
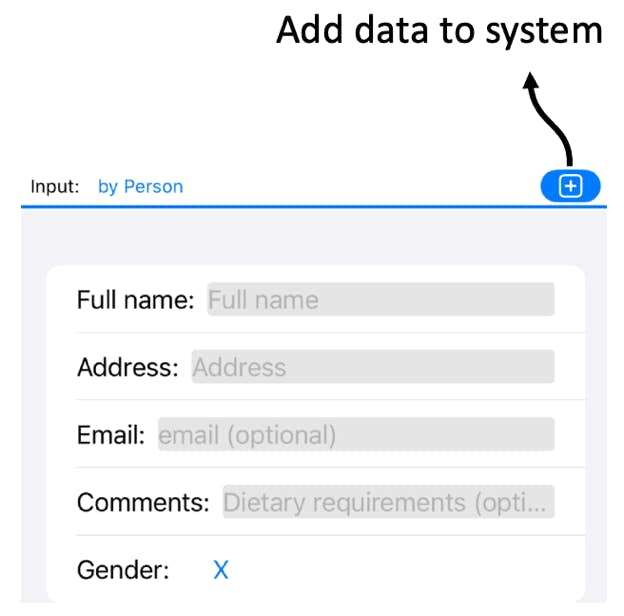
Person by person
For completeness, the Planner also offers a way to input the details of Participants on a one-by-one basis. The interface is self-explanatory.
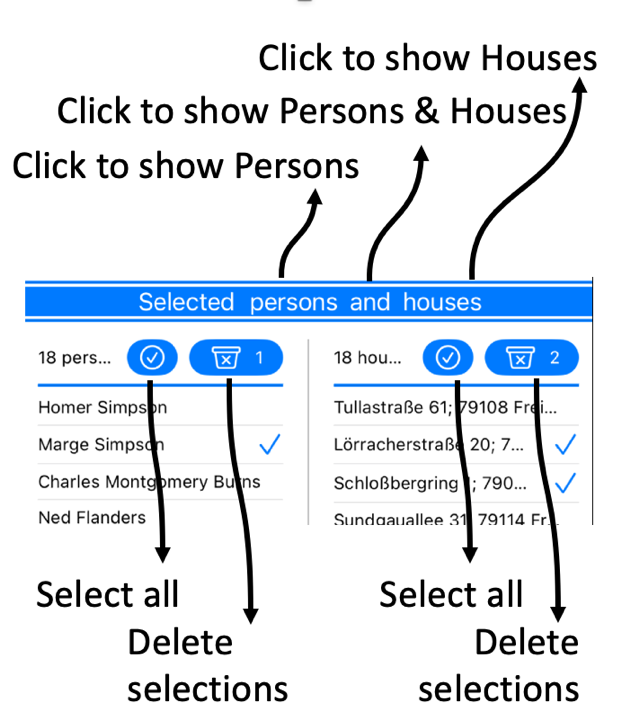
Data Viewer
In the lower part of the screen the Participant and Houses data that is currently in the Planner’s database can be inspected. In the header the use can select which data to show: Participants, Houses, or both. In the viewer, individual Houses or Participants can be selected and deleted (