Running Dinner Planner
Course preferences
General
In most practical Running Dinner cases, participating Houses express a preference for serving a specific Course. While the Planner operates best when constrained the least (and it is, arguably, the most fair if all participating Houses are willing to cater any Course), this screen allows the Dinner’s organiser to input any preferences Houses might have for serving a specific Course, or even to tell the system a House is unwilling to serve a specific Course. This screen can also be used by the organiser to force the Planner app to assign certain Houses to certain Courses. This is accomplished by simply setting the preference for a House to “not interested” for all but the Course the organiser wants the House to cater.
There are as many ‘preference-levels’ as there are Courses. Also, it is quite possible to list more than one Course as “1st preference”, or one Course as “1st preference” and the other Courses as “3rd preference”. The Planner app will attempt to honour these preferences where possible by way of the penalty system (see the penalty section in the Planner screen): any mismatch between the Course actually assigned to a House and its listed preferences will contribute to the overall penalty the seating arrangement (aka solution, aka configuration) receives. Only if a Course is listed as “not interested” is the House guaranteed not to be assigned to that Course.
This screen also allows the Dinner’s organiser to assign one or two Houses to cater either or both of the Afterparty and a Reception. Typically, this implies these Houses will not be catering any Course, but the Planner allows for both scenarios.
There are three ways of inputting preferences into the system, selectable by clicking the field to the right of “Input” :
The information banner
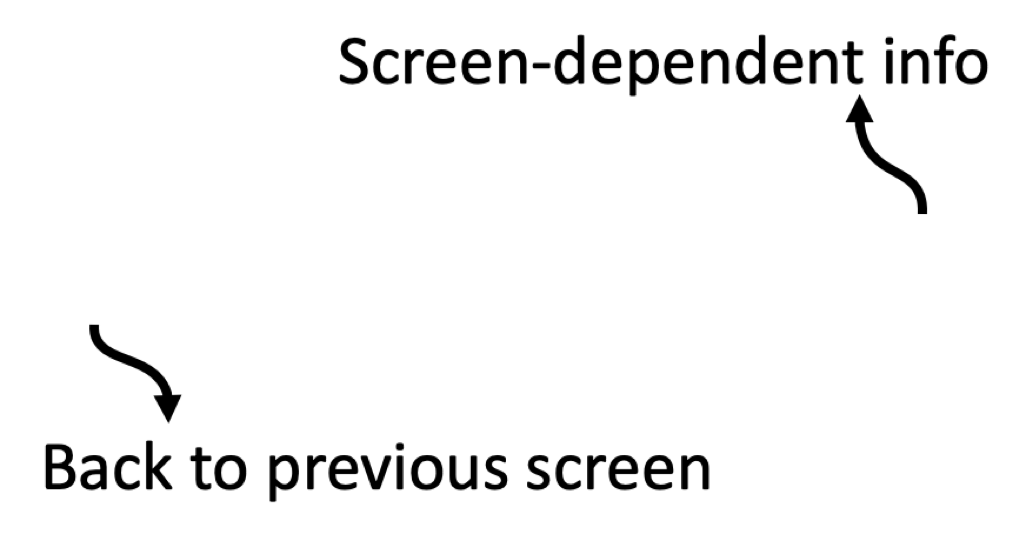
As with all screens, a context-dependent information banner is located at the top of the screen. It features a “back to previous screen” button on the left, and a button for context-dependent help on the right
Input methods
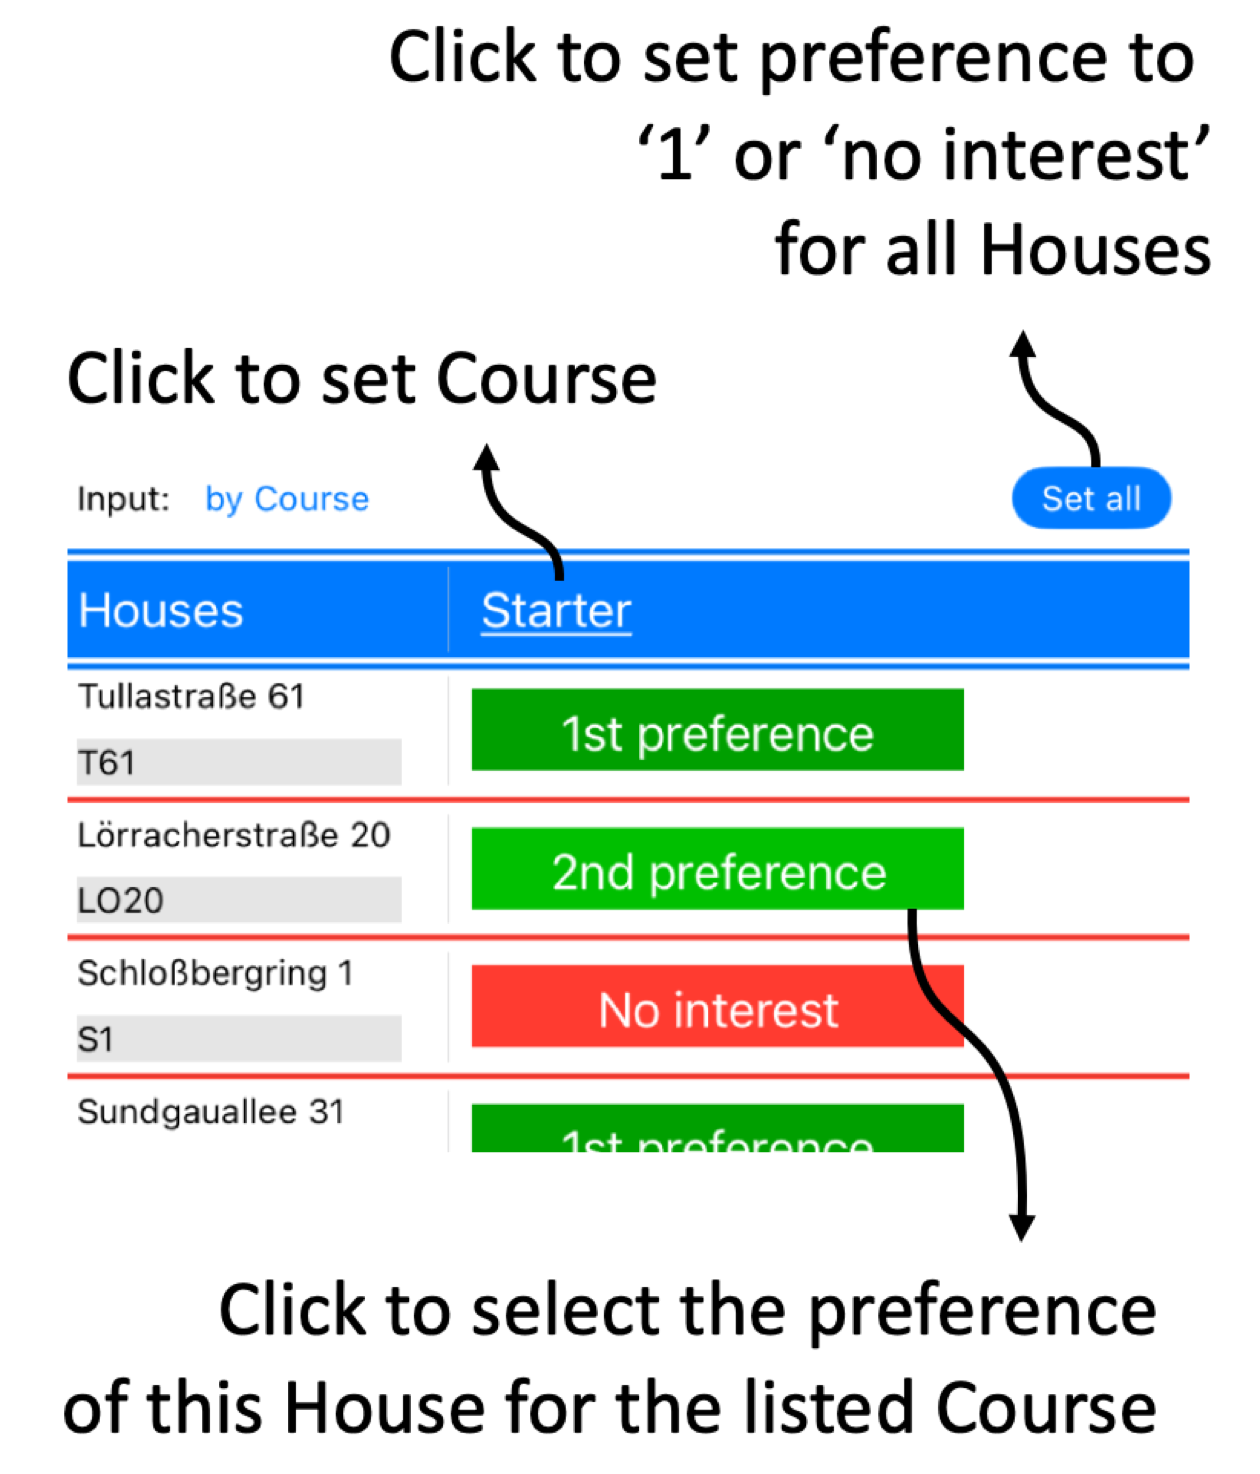
Course-by-Course
This screen can be used to select a Course, and subsequently assign any preference a House has for catering that Course. Default values are always ‘1st preference’, for any Course. By selecting ‘Reception’ or ‘Party’ from the Course drop-down, the user can assign one House to each of those ‘special Courses’. The latter is however not required.
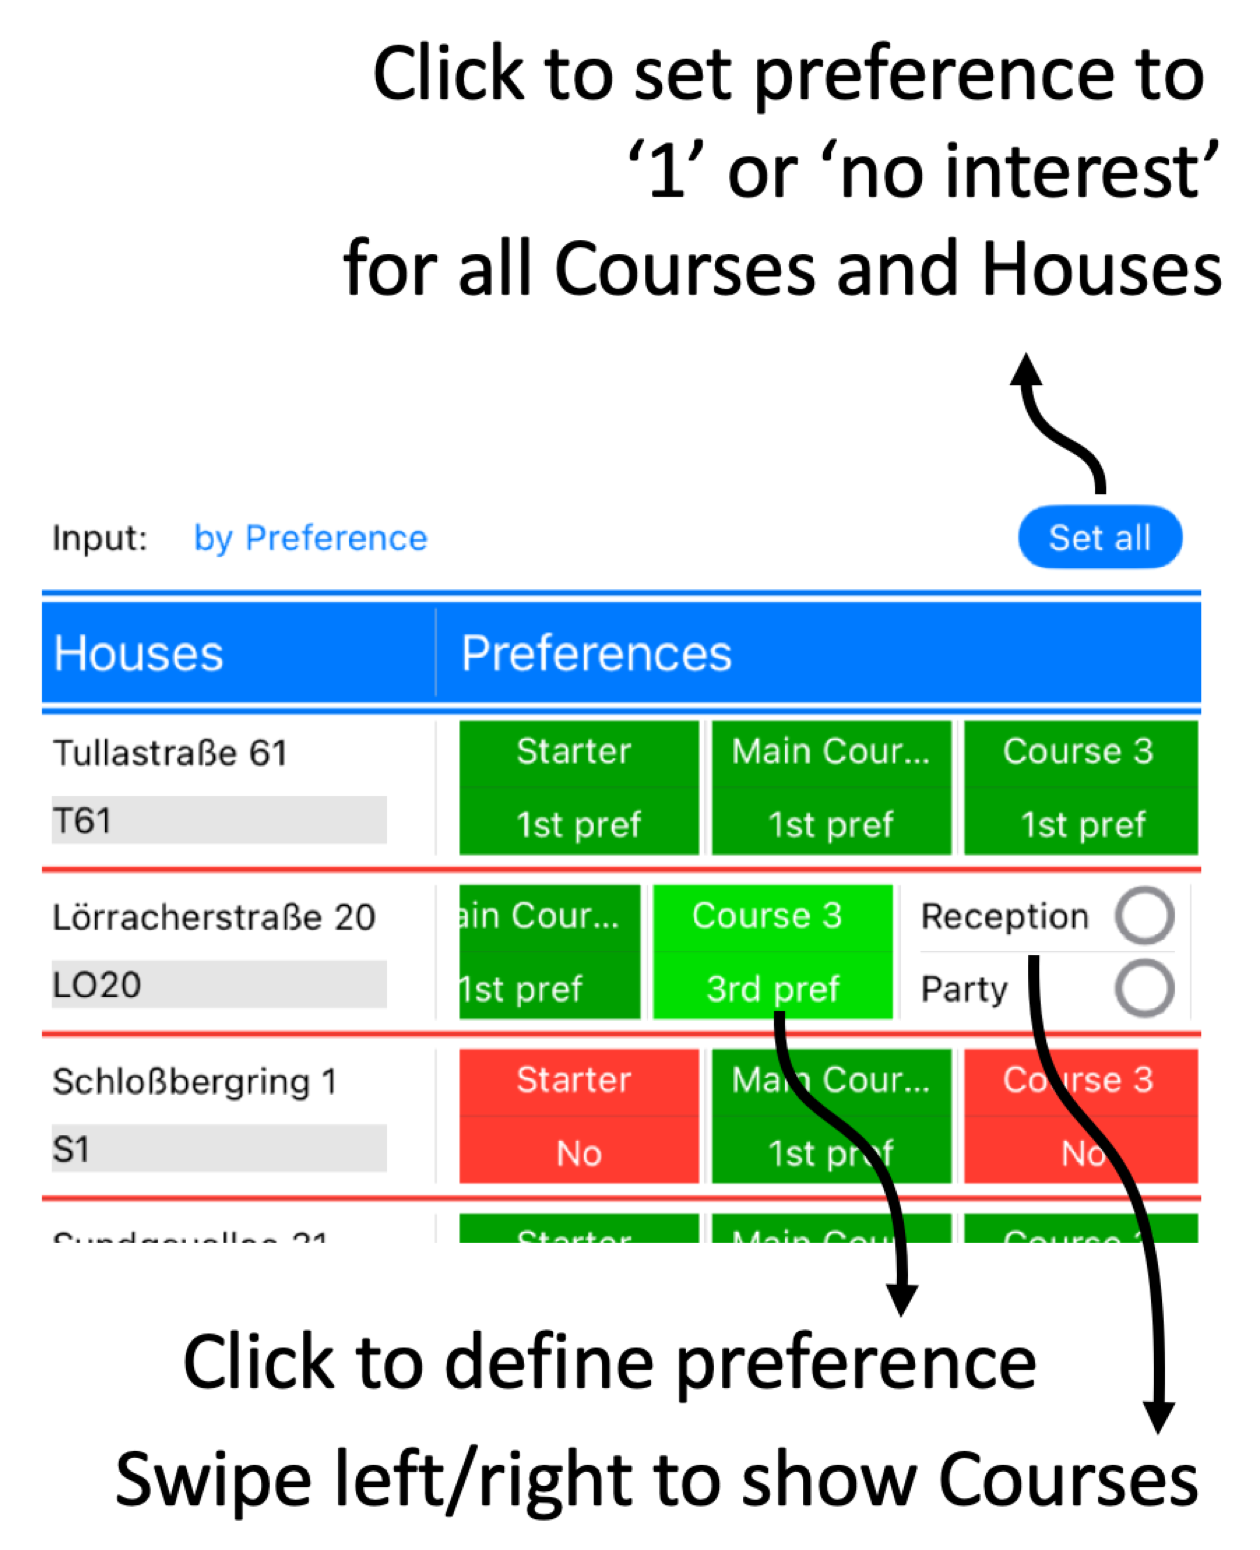
By Preference
This screen shows all the Courses (and the preference for catering them) for each House in one table, in addition to listing the Party and the Reception. All rows in the table can be swiped left and right, and the lower part of the coloured cells can be clicked to define the preference of that House for catering that Course.
As CSV
CSV - the interface
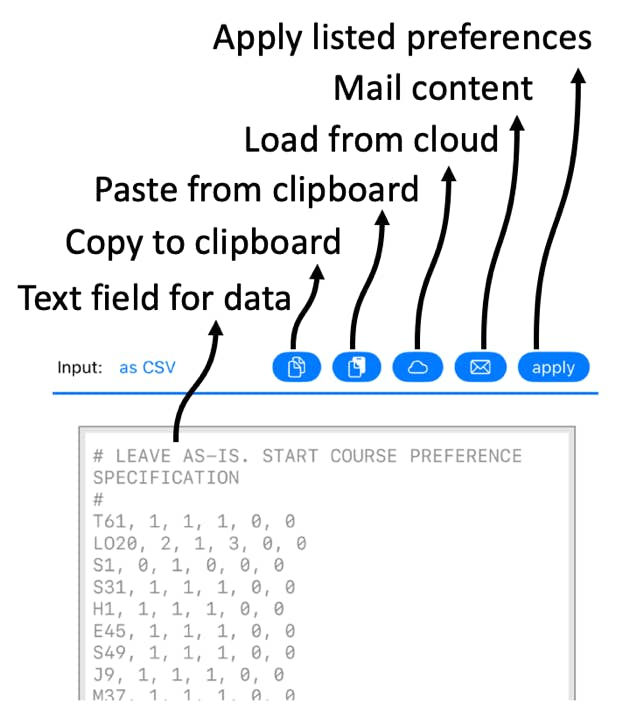
Arguably the easiest way of inputting Course preferences into the system is by way of the MyPlanner section on the website. To make use of this, the user needs to create and login to an account on www.running-dinner-planner.com, and copy-paste data from, for example, Excel into the web interface. See also the CSV tutorial on the Tutorials page. That data can subsequently be downloaded from MyPlanner with the click of the cloud (
The format the data needs to have is that of a Comma-Separated-Value (CSV) list, and can be inspected in the CSV text field. One line should contain:
ShortAddress,Pref_1,Pref_2,Pref_3,...,Pref_n,Pref_Reception,Pref_Party,
Notes:
When loaded, the text field will contain the data currently available to the Planner. With the Copy (
CSV - downloading data from the cloud
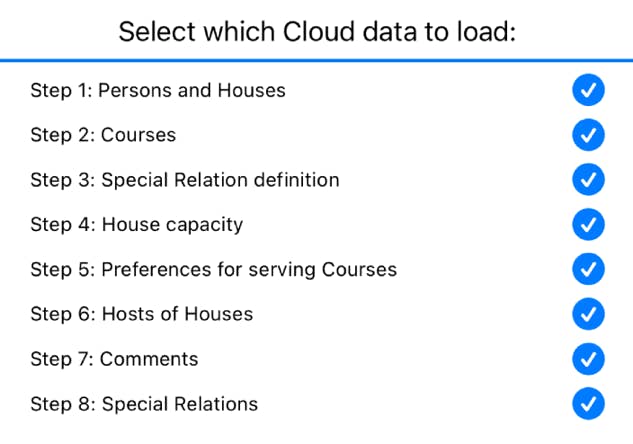
In MyPlanner data can be stored for all the Steps involved in planning a Running Dinner. While, for each Step, the relevant data can be loaded on its own, the CSV functionality also allows for importing data for more than just 1 Step into the Planner. That is to say: upon pressing the cloud button (